


Tips and Tricks
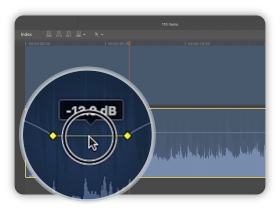
Create Volume Keyframes
Press and hold the ALT key and click
on your volume level to create keyframes.
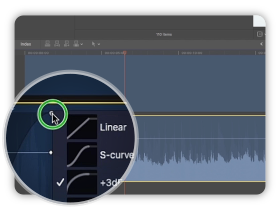
Choose a Fade Shape
Right Click on a fade and choose
between 4 different fade shapes.
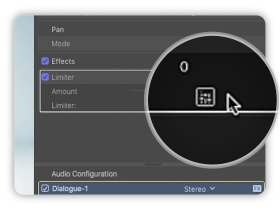
Advanced Effect Editor
Click on this button and you will
access to advanced effect controls.
Tutorial Transcript
Hello, I am Florian Godard from CreativeMedias. In this tutorial I will show you some audio editing techniques using Final Cut Pro X.
Open your Final Cut project, then drag a music file in the timeline. If you purchased a template that include music, you can find it inside the Media folder.
Now you can access to the audio parameters inside the inspector panel. You can adjust volume and standard effects. Another way to adjust volume is to add keyframes directly on the timeline. Zoom in to have a better view, then you can easily add keyframes by press and hold the ALT key and click on your volume level. You can modify a keyframe or delete it using right-click then delete.
It is easy to add fade in and fade out to your audio file. At the very beginning of your layer you will find the fade control. Click and hold and displace to the right to adjust the fade in curve. By right-clicking on it you have access to 4 different fade shapes. I recommend to choose a S-curve to fade two files properly.
If you add a voice over in your project, I recommend to use a limiter effect to fix volume levels. You will find it in the Audio > Levels category. Apply the limiter effect to your clip, then access to the controls using the advanced effect editor button. Press play and start adjusting parameters. Increase Gain until you see activity in the Gain Reduction bar. Becarefull if you put too much gain, the sound will be distorted and it can sounds worse than before. So listen and find a good compromise! The second important settings is the output level. If you play your voice over a background music, I recommend to use a range between -8 and -4.
If you have multiple edits you can easily copy past effects from one clip to another. Select the clip with the effects you want to copy and in Edit menu, select copy. Now select one or multiple clips and in the Edit menu, select Paste Effects.
To export your audio file, in the File menu select Share… then Master File. In the Settings panel format option, select Audio Only. Click on Next, edit the file name and change your export folder if needed. Rendering audio is pretty fast, your new file will be ready soon!
I hope this tutorial has been helpful for you, thank you for watching!
Comments are closed.